Werewolf Display Tank Step by Step
This step by step explains the method I used to paint a fibreglass half tank for display purposes. A lot of people have asked me where you can get these blanks. They are supplied by Pinstriping UK and come in this style or the smaller peanut (Sportster) type.
The paint used for this was Etac and Auto Air. The airbrush used was my Iwata hp-b, which has a 0.2mm nozzle.
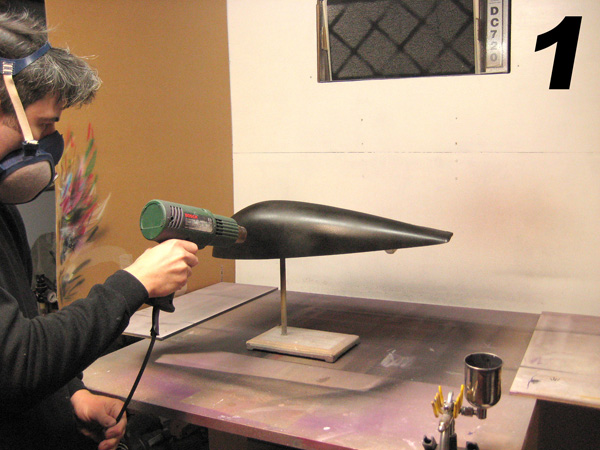
Step1: To begin with I thoroughly wiped the surface with a degreaser to remove any residue that may have been left on the tank from the moulding process. The surface was then keyed using a red scotchbrite pad. With the preparation stage completed I sprayed the tank with Auto Air Base Coat Sealer Dark. I then sprayed Auto Air Opaque Black as my base colour.
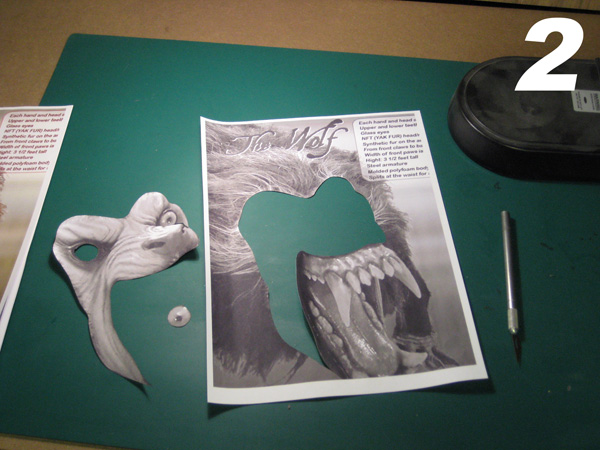
Step2: The image was printed onto A4 paper and used to map out the main areas as I went along by cutting out sections with a scalpel. The beauty of this method is that you don’t do any cutting on the tank itself and it is much easier to blend in the masked and freehand work. I usually start out by cutting the brightest parts first which more often than not are the eyes and teeth. I also set the cut outs to one side in case I need to use them later on.
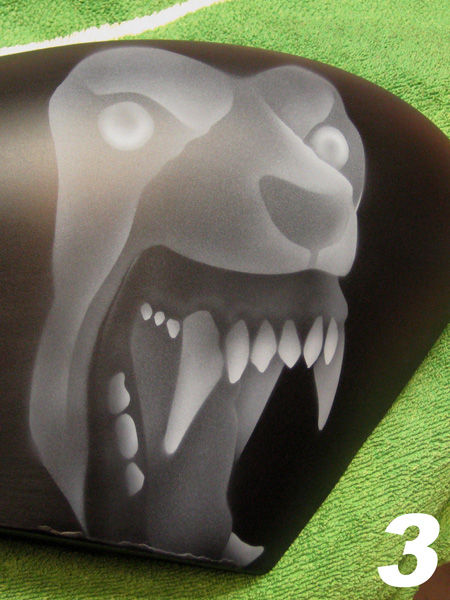
Step3: Here you can see the initial layout. It does look frighteningly stencilled I must admit! I’m using Etac EFX white for this.
Step4: At this point I begin the freehand work to add shading, detail and to lose some of the hard edges of the previous step. You don’t have to overdo the details but it is a good idea to get as much in as you can for the next stage.
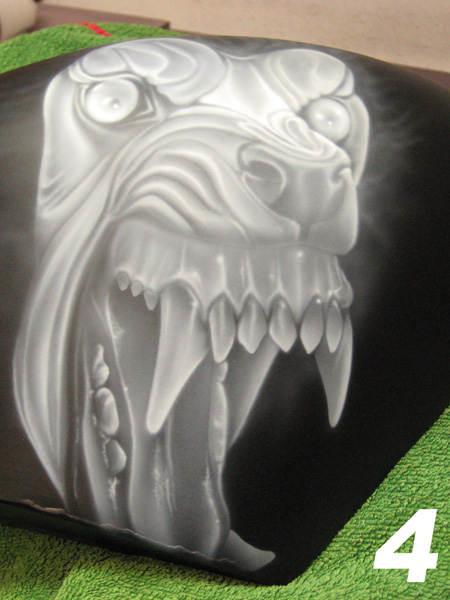
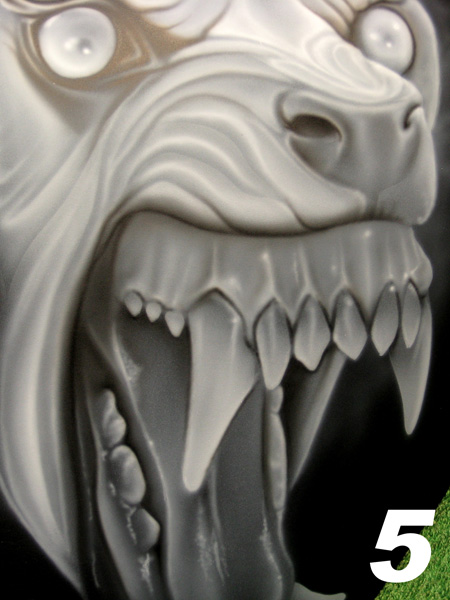
Step5: With Etac EFX black I now come in with the darker areas and start to make this look something like the finished article. This is the part that you want to detail the most. All of the wrinkles and creases need to show for maximum effect. You are also making this look more 3D by adding depth with the shadows.
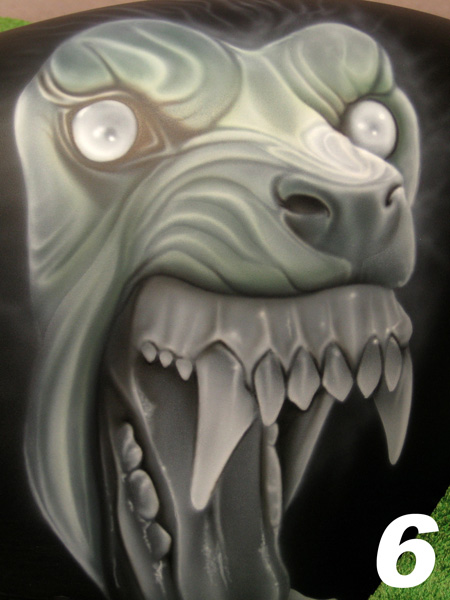
Step6: The next step is to under paint the face by spraying a light base colour of Auto Air Transparent green (reduced with 4011). This is the reason for initially starting out with white because it provides the foundation for the transparent colours to follow.
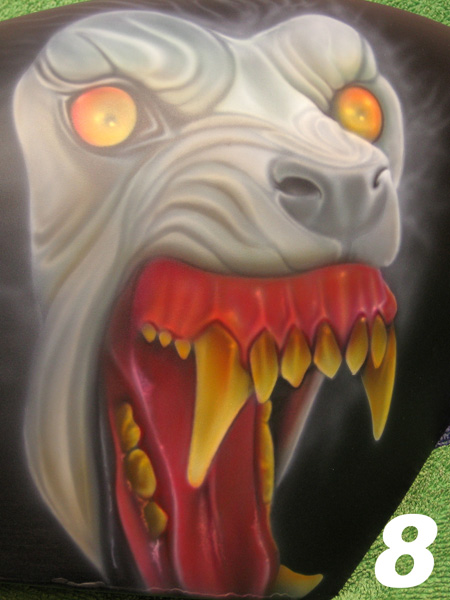
Step7: Next in comes the Auto Air Transparent yellow for the eyes and teeth. I’m just filling in areas at the moment.

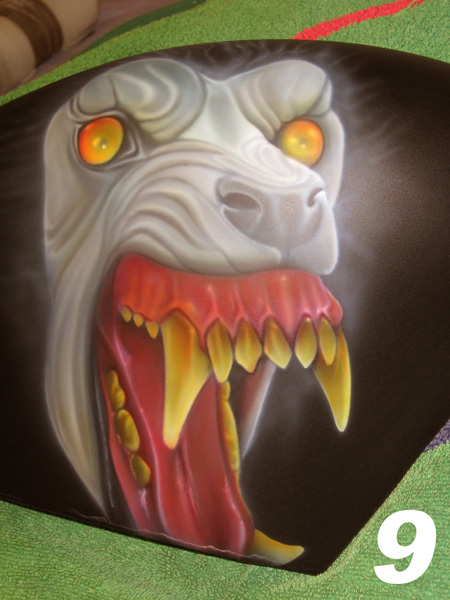
Step8: With Auto Air Transparent red I colour the gums, tongue and also shade the teeth and eyes which makes them turn a nice orange. I also detail the gums and tongue with Auto Air magenta and purple. It’s very tempting to simply bring out the black again for this but you can make everything look very dull quite easily. I also shade the face with Auto Air grey thinned out with the 4011.
Step9: At this point I come back with the black and white to re-instate some of the detail and highlights that get lost when layering over the various colours.
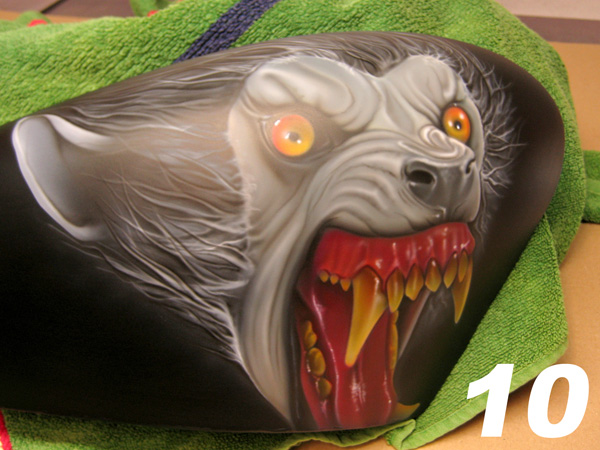
Step10: Here you can see I have now started on the straggly hair and added the pointed ear. I wanted to try and fit the head to the shape of the tank.
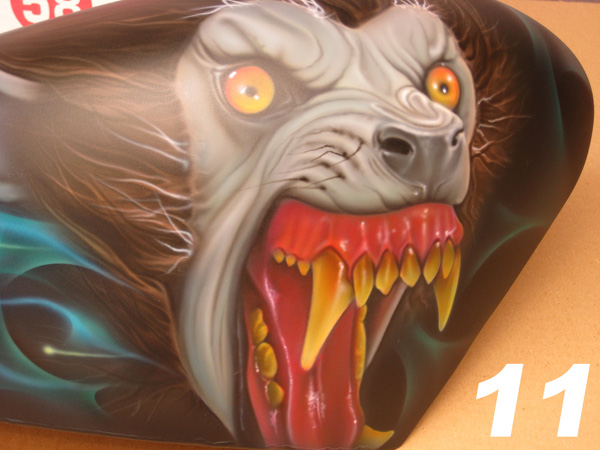
Step11: With Auto Air Transparent brown I coloured the hair and added some blue/green fire behind the head for effect. I didn’t use yellow/orange, as I wanted to use something that would complement the eye and teeth colours.
Step12: As this is a display piece I thought it might be a good idea to add some lettering advertising the fact that it was painted by me instead of just a tiny signature at the bottom. I decided to go with a font reminiscent of the old horror comic books. I used a red to orange fade for this.
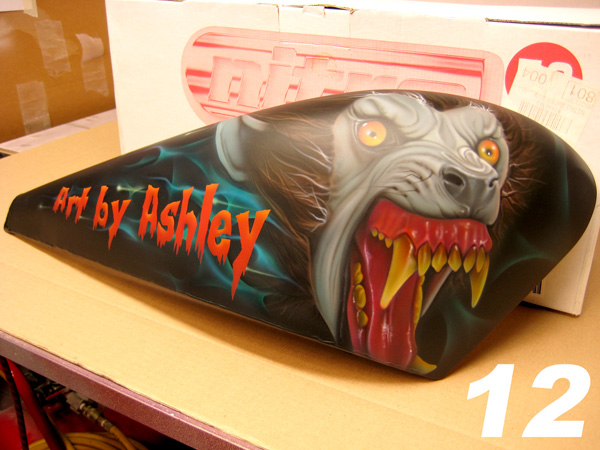
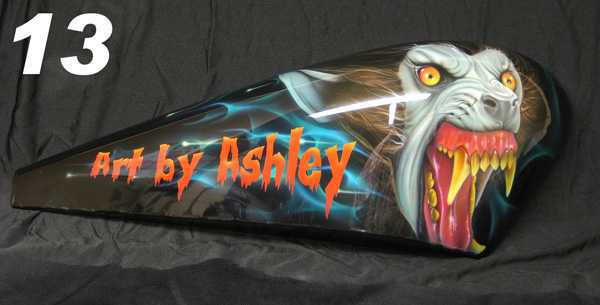
Step 13: After a few coats of clear it was then flatted and polished ready to hang.